
OpenOCD and Ethernut 3
This document provides detailed information about using the Open On-Chip Debugger with Ethernut 3.
Prerequisites
- Desktop computer with USB port, running Windows, Linux or OS X
- Nut/OS 4.8 or later, already installed
- Ethernut 3 Board
- Turtelizer 2 (included in the Ethernut 3 Starter Kit)
- Power supply for Ethernut 3
- USB cable
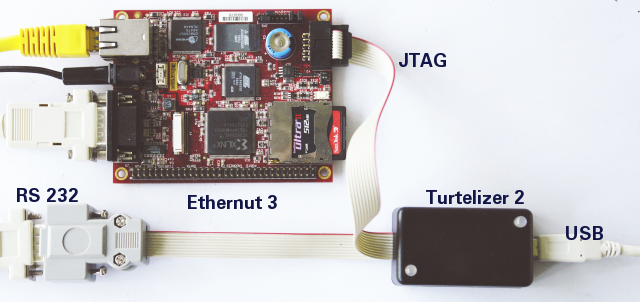
About Turtelizer 2
The Turtelizer 2 JTAG Adapter is an Open Source Hardware, based on the FT2232 chip from Future Technology Devices International Ltd . It provides two configurable USB devices. The Turtelizer 2 uses the first one for its JTAG interface, while the second device serves as a USB to RS-232 bridge. In this document we will use the JTAG interface.
Technical details of the Turtelizer 2 internals are discussed in a separate document.
Installation on Windows
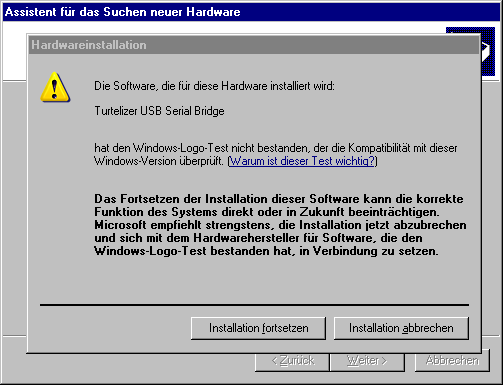
Warning: You must install the FTDI driver first before attaching Turtelizer 2 to a USB port.
Step 1: Download the latest FTDI driver for Turtelizer 2, available on our download page. Unpack the Zip archive in any directory of your choice.
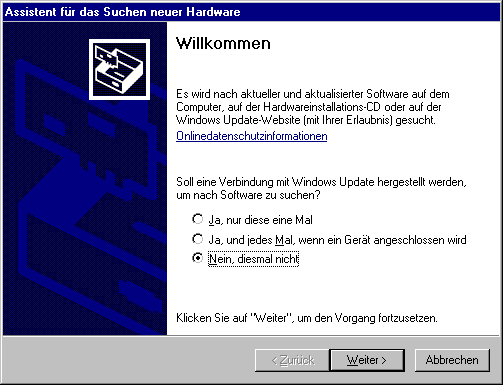
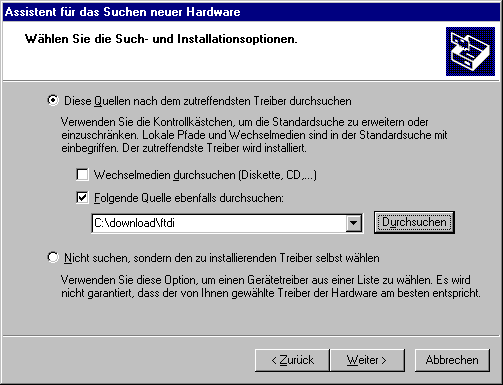
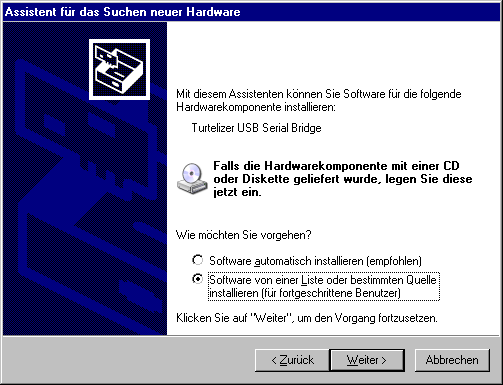
Step 2: Connect one end of the USB cable to the PC USB port and the other to the USB connector on the Turtelizer. Windows will automatically detect the new Turtelizer hardware. Concurrently the first screen of the Found New Hardware Wizard appears. Follow the instruction. Make sure that the option Specify a location is selected and deselect all others. The driver is located in the folder where you unpacked the Zip archive in step 1.
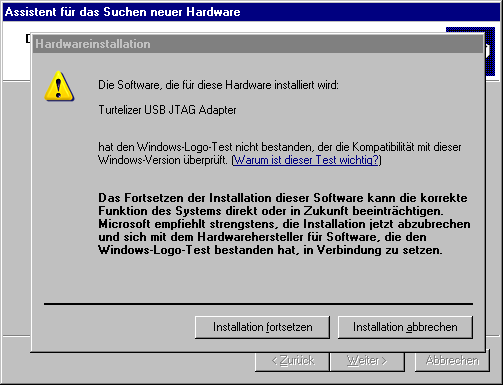
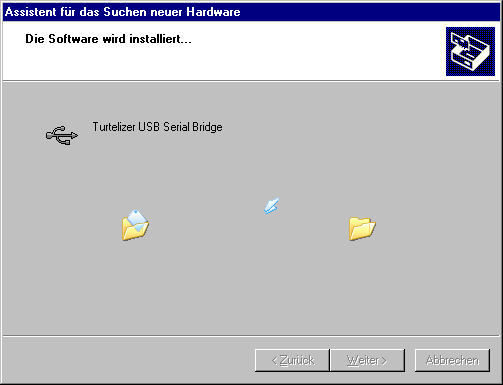
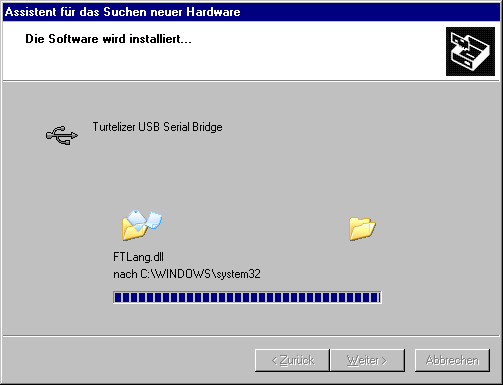
Note that the Turtelizer adapter has 2 interfaces, the JTAG adapter and the USB/RS232 bridge. The driver for the JTAG interface will be installed first.


Next the driver for the USB/RS232 bridge will be installed.


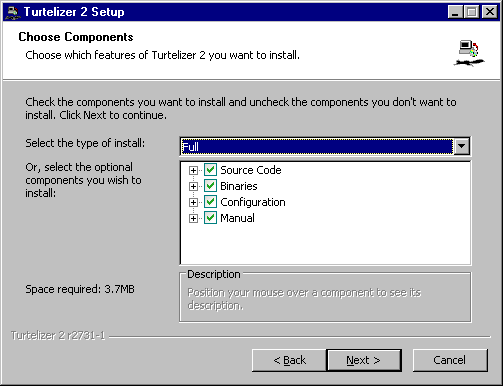
Step 3: Download the latest OpenOCD installer package for Turtelizer 2, available on our download page. Thanks to NSIS, which had been used to create this package, the installation is easily done by starting the installation executable and pressing a few buttons.
It is recommended that you have already installed Nut/OS. The OpenOCD installer will automatically detect the Nut/OS installation directory and place the OpenOCD binary in nut\tools\win32 and the OpenOCD configuration in nut\tools\turtelizer2.


When done, you should find the new entry Turtelizer 2 in the Windows start menu.
For a first test connect the Turtelizer's JTAG connector to the Ethernut 3 board, power up the board and select Connect Ethernut 3.X in the start menu. A text mode window will appear, displaying the following text.
Open On-Chip Debugger 0.4.0-rc1 (2010-02-02-07:03)
For bug reports, read
        http://openocd.berlios.de/doc/doxygen/bugs.html
srst_only srst_pulls_trst srst_gates_jtag srst_open_drain
jtag_nsrst_delay: 300
jtag_ntrst_delay: 300
fast memory access is enabled
dcc downloads are enabled
16000 kHz
Info : device: 4 "2232C"
Info : deviceID: 67354056
Info : SerialNumber: TLQW09LBA
Info : Description: Turtelizer JTAG/RS232 Adapter A
Info : clock speed 6000 kHz
Info : JTAG tap: at91r40008.cpu tap/device found: 0x1f0f0f0f (mfg: 0x787, part: 0xf0f0, ver: 0x1)
Info : Embedded ICE version 1
Info : at91r40008.cpu: hardware has 2 breakpoints or watchpoints
You can stop OpenOCD by pressing Ctrl-C in the text mode window.
If you want to try OpenOCD and the Turtelizer 2 with any other board, you additionally need a 10 to 20-pin JTAG adapter.
Installation on Linux
NOTE: The following description is outdated, but may still work for you.
The OpenOCD source code can be retrieved from the SVN repository at developer.berlios.de/svn .
$ svn co -r 717 svn://svn.berlios.de/openocd/trunk openocd-r717The included README file contains a detailed description. A few essential tools are required to create the binaries. The following commands may be used on Debian to make sure that all tools are available:
$ sudo apt-get install build-essential
$ sudo apt-get install automake
$ sudo apt-get install autoconf
If not already installed, we further need the FTDI support library. There are two variants, we chose the one supplied by FTDI:
$ wget http://www.ftdichip.com/Drivers/D2XX/Linux/libftd2xx0.4.13.tar.gz
$ tar -zxf libftd2xx0.4.13.tar.gz
$ sudo cp *.h /usr/local/include/
$ sudo cp libftd2xx.so.0.4.13 /usr/local/lib/
$ cd /usr/local/lib/
$ sudo ln -s libftd2xx.so.0.4.13 libftd2xx.so
$ sudo ln -s libftd2xx.so.0.4.13 libftd2xx.so.0
$ cd /usr/lib/
$ ln -s /usr/local/lib/libftd2xx.so.0.4.13 libftd2xx.so.0
/etc/fstab (sudo):
none /proc/bus/usb usbdevfs defaults,mode=0666 0 0
(use usbfs in 2.6 kernels, 'uname -a')
$ sudo mount -a
In the next step we can build OpenOCD, using
$ cd openocd-r717/
$ ./bootstrap
$ ./configure  --enable-ft2232_ftd2xx
$ make
$ sudo make install
The following entry should appear in /proc/bus/usb/devices after plugging in the Turtelizer 2:
T:  Bus=01 Lev=01 Prnt=01 Port=00 Cnt=01 Dev#=  4 Spd=12  MxCh= 0
D:  Ver= 2.00 Cls=00(>ifc ) Sub=00 Prot=00 MxPS= 8 #Cfgs=  1
P:  Vendor=0403 ProdID=bdc8 Rev= 5.00
S:  Manufacturer=egnite
S:  Product=Turtelizer JTAG/RS232 Adapter
S:  SerialNumber=TLQ08BET
C:* #Ifs= 2 Cfg#= 1 Atr=80 MxPwr=100mA
I:  If#= 0 Alt= 0 #EPs= 2 Cls=ff(vend.) Sub=ff Prot=ff Driver=(none)
E:  Ad=81(I) Atr=02(Bulk) MxPS=  64 Ivl=0ms
E:  Ad=02(O) Atr=02(Bulk) MxPS=  64 Ivl=0ms
I:  If#= 1 Alt= 0 #EPs= 2 Cls=ff(vend.) Sub=ff Prot=ff Driver=(none)
E:  Ad=83(I) Atr=02(Bulk) MxPS=  64 Ivl=0ms
E:  Ad=04(O) Atr=02(Bulk) MxPS=  64 Ivl=0ms
Installation on OS X
NOTE: The following description is outdated, but may still work for you.
If not already done, download Xcode from
developer.apple.com/tools/xcode/
and install it. Xcode contains all the GNU tools, which are
need to create the OpenOCD binary from the source code.
 Download the Mac OS X driver from
www.ftdichip.com/Drivers/D2XX.htm
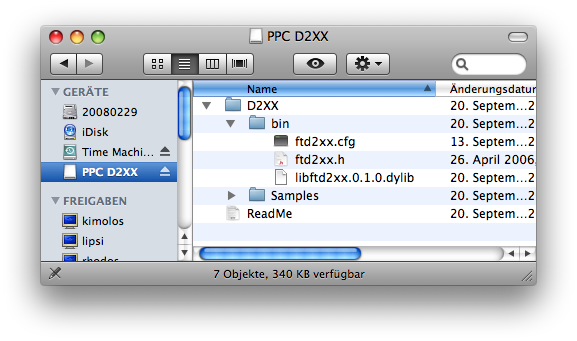
The driver is packed in a disk image file. Double click it to
mount the image.
To install the driver, open Terminal and execute the following commands:
$ cd /Volumes/PPC\ D2XX/D2XX/
$ sudo mkdir -p /usr/local/lib /usr/local/include
$ sudo cp bin/libftd2xx.0.1.0.dylib /usr/local/lib/
$ sudo ln -sf /usr/local/lib/libftd2xx.0.1.0.dylib /usr/local/lib/libftd2xx.dylib
$ sudo cp bin/ftd2xx.h /usr/local/include/
$ sudo cp Samples/WinTypes.h /usr/local/include/
Retrieve the OpenOCD source code from the SVN repository at developer.berlios.de/svn . For this, open Terminal and enter:
$ svn co -r 717 svn://svn.berlios.de/openocd/trunk openocd-r717
Building and installing OpenOCD for OS X is similar to Linux. In a Terminal window enter:
$ cd openocd-r717/
$ ./bootstrap
$ ./configure  --enable-ft2232_ftd2xx
$ make
$ sudo make install
Configuring OpenOCD
Due to its flexible configuration, OpenOCD supports many different target
boards. The standard installation already provides a number of basic
configuration files. The following instructions will show how to use OpenOCD
with the Ethernut 3.0 board. The following files, located in tools/turtelizer2,
are available for this board:
ethernut3.cfg
User configuration for Ethernut 3
#
# OpenOCD configuration file for Ethernut 3
#
# http://www.ethernut.de/en/hardware/enut3/

source [find board/ethernut3.cfg]

proc nut {{COMMAND ""} args} {
	if {$COMMAND == "init"} {
		board_init
	} elseif {$COMMAND == "remap"} {
		board_remap 1
	} elseif {$COMMAND == "flash"} {
		eval nut_flash $args
	} elseif {$COMMAND == "run"} {
		eval nut_run $args
	} else {
		nut_help
	}
}

proc nut_help {} {
	puts "nut remap"
	puts "  remaps memory"
	puts "nut flash <file> \[<bin|ihex|elf> \[<address>\]\]"
	puts "  writes image to flash"
	puts "nut run <file> \[<bin|ihex|elf> \[<address>\]\]"
	puts "  executes image in RAM"
	puts "reset init"
	puts "  initializes the board"
	puts "halt"
	puts "  halts the CPU"
	puts "help"
	puts "  lists OpenOCD commands"
}


# Determine default image type
#
proc nut_imgtype {IMGFILE {TYPE ""}} {
	if {$TYPE == ""} {
		if [string match -nocase "*.bin" $IMGFILE] {
			set TYPE "bin"
		} elseif [string match -nocase "*.elf" $IMGFILE] {
			set TYPE "elf"
		} elseif [string match -nocase "*.hex" $IMGFILE] {
			set TYPE "ihex"
		}
	}
	return $TYPE
}


# Determine default image offset
#
proc nut_imgtypeoffset {TYPE {OFFSET ""} {BASE 0}} {
	if {$OFFSET == ""} {
		if {$TYPE == "bin"} {
			set OFFSET $BASE
		} else {
			set OFFSET 0
		}
	}
	return $OFFSET
}


# Write image to flash.
#
proc nut_flash {IMGFILE {TYPE ""} {OFFSET ""}} {
	reset init
	set TYPE [nut_imgtype $IMGFILE $TYPE]
	set OFFSET [nut_imgtypeoffset $TYPE $OFFSET 0x10000000]
	flash write_image erase $IMGFILE $OFFSET $TYPE
	verify_image $IMGFILE $OFFSET $TYPE
}

# Execute a binary image in RAM at a given address.
#
# Resets the CPU, but doesn't remap memory.
# Useful for basic hardware tests on virgin boards.
#
proc nut_run {IMGFILE {TYPE ""} {OFFSET ""}} {
	halt
	set TYPE [nut_imgtype $IMGFILE $TYPE]
	if {$OFFSET == ""} {
		if {$TYPE == "bin"} {
			set OFFSET 0x10000000
		} else {
			set OFFSET 0
		}
	}
	load_image $IMGFILE $OFFSET $TYPE
	resume $OFFSET
}
board/ethernut3.cfgBoard configuration for Ethernut 3
#
# Ethernut 3 board configuration file
#
# http://www.ethernut.de/en/hardware/enut3/


# AT91R40008-66AU ARM7TDMI Microcontroller
# 256kB internal RAM
source [find target/at91r40008.cfg]


# AT49BV322A-70TU NOR Flash
# 2M x 16 mode at address 0x10000000
# Common flash interface supported
#
set _FLASHNAME $_CHIPNAME.flash
flash bank $_FLASHNAME cfi 0x10000000 0x400000 2 2 $_TARGETNAME


# Micrel MIC2775-29YM5 Supervisor
# Reset output will remain active for 280ms (maximum)
#
jtag_nsrst_delay 300
jtag_ntrst_delay 300


arm7_9 fast_memory_access enable
arm7_9 dcc_downloads enable
jtag_khz 16000


# Target events
#
$_TARGETNAME configure -event reset-init { board_init }

# Initialize board hardware
#
proc board_init { } {
	board_remap
	flash probe 0
}

# Memory remap
#
proc board_remap {{VERBOSE 0}} {
	# CS0: NOR flash
	#      16MB @ 0x10000000
	#      16-bit data bus
	#      4 wait states
	#
	mww 0xffe00000 0x1000212d

	# CS1: Ethernet controller
	#      1MB @ 0x20000000
	#      16-bit data bus
	#      2 wait states
	#      Byte select access
	#
	mww 0xffe00004 0x20003025

	# CS2: CPLD registers
	#      1MB @ 0x21000000
	#      8-bit data bus
	#      2 wait states
	#
	mww 0xffe00008 0x21002026

	# CS3: Expansion bus
	#      1MB @ 0x22000000
	#      8-bit data bus
	#      8 wait states
	#
	mww 0xffe00010 0x22002e3e

	# Remap command
	#
	mww 0xffe00020 0x00000001

	if {$VERBOSE != 0} {
		puts "0x00000000 RAM"
		puts "0x10000000 Flash"
		puts "0x20000000 Ethernet"
		puts "0x21000000 CPLD"
		puts "0x22000000 Expansion"
	}
}
target/at91r40008.cfgTarget configuration for the AT91R40008 CPU used on Ethernut 3
# AT91R40008 target configuration file

# TRST is tied to SRST on the AT91X40 family.
reset_config srst_only srst_pulls_trst


if {[info exists CHIPNAME]} {
   set  _CHIPNAME $CHIPNAME
} else {
   set  _CHIPNAME at91r40008
}

if { [info exists ENDIAN] } {
   set  _ENDIAN $ENDIAN
} else {
   set  _ENDIAN little
}

# Setup the JTAG scan chain.
if { [info exists CPUTAPID ] } {
   set _CPUTAPID $CPUTAPID
} else {
   set _CPUTAPID 0x1f0f0f0f
}
jtag newtap $_CHIPNAME cpu -irlen 4 -ircapture 0x1 -irmask 0xf -expected-id $_CPUTAPID

set _TARGETNAME $_CHIPNAME.cpu
target create $_TARGETNAME arm7tdmi -endian $_ENDIAN -chain-position $_TARGETNAME -variant arm7tdmi
$_TARGETNAME configure -work-area-phys 0x20000 -work-area-size 0x20000 -work-area-backup 0
Finally there isinterface/turtelizer2.cfg
Configuration for Turtelizer 2
#
# egnite Turtelizer 2
#
# http://www.ethernut.de/en/hardware/turtelizer/index.html
#

interface turtle
# interface ft2232
ft2232_device_desc "Turtelizer JTAG/RS232 Adapter"
ft2232_layout turtelizer2
ft2232_vid_pid 0x0403 0xbdc8
When starting OpenOCD on the command line, you only need to specify the first and the last file. The board and target configurations are included by the user configuration (via the source command). Let's do this now.
Using OpenOCD
Step 1: If not already done, connect the Turtelizer to any USB port on the PC and attach the Turtelizer's 10-pin flat cable connector to the JTAG 10-pin box header of your target board. Then switch on the power supply for the target board.
Step 2: Open a command line window. On Windows change to <install-dir>/nut/tools/turtelizer2. Replace <install-dir> with the name of the folder you selected during OpenOCD installation. Make sure, that <install-dir>/nut/tools/win32 is in your path.
set PATH=c:\ethernut-4.8.6\nut\tools\win32;%PATH%
Step 3: Enter the following command to start OpenOCD with Turtelizer 2 connected to Ethernut 3:
openocd -f interface/turtelizer2.cfg -f ethernut3.cfg
Step 4: Open a second command line window to connect to the OpenOCD TELNET interface.
telnet localhost 4444This should give the following response:
Open On-Chip Debugger
>
If the connection fails, try
telnet 127.0.0.1 4444
We can now control OpenOCD by entering simple commands in the TELNET window, one of which is help. It displays a list of all built-in commands.
The user configuration file provides a few more command to simplify common tasks. Entering nut in the TELNET window will display a short description.
nut remap
  remaps memory
nut flash <file> [<bin|ihex|elf> [<address>]]
  writes image to flash
nut run <file> [<bin|ihex|elf> [<address>]]
  executes image in RAM
reset init
  initializes the board
halt
  halts the CPU
help
  lists OpenOCD commands
To flash the boot loader, simply type
nut flash bootmon.binHowever, this requires to have bootmon.bin available in the same directory where OpenOCD is running. Otherwise you need to provide a relative or absolute path.
nut flash ../../boot/bootmon/bootmon.bin
Of course you can use the same command to flash your own applications, so there is no need to load it via TFTP each time. However, this requires a special build of your application code.
You may alternatively tell OpenOCD to directly execute certain commands when started, using the option -c.
openocd -f interface/turtelizer2.cfg -f ethernut3.cfg -c init -c "nut flash bootmon.bin" -c "shutdown"The command init will exit OpenOCD's configuration stage and the command shutdown will terminate OpenOCD.
This feature can be used to implement a completely automatic procedure of building and flashing an application via
make burn
On the last page of the Nut/OS Configurator Settings select arm-oocd. To activate this change, re-create the sample directory again (your changes will be preserved) or manually modify the file Makedefs in your application directory, where the selected Makeburn file is defined.
include $(top_srcdir)/app/Makeburn.arm-oocd
If make burn is not working out of the box, don't give up too soon. This is a new feature and may not be available in your current version. Visually inspect nut/app/Makeburn.arm-oocd with your text editor. It shoudn't be too difficult to set it up correctly. Here is one, that is working with Ethernut 3 and OpenOCD 0.4.0-rc1:
## Upload Configuration for OpenOCD
## ================================
## When properly configured, you can conveniently use
##  make clean all burn
## to build, upload and run the binary.


## Choose the programming adapter
## ------------------------------
## A file with this name and extension .cfg must exist in
## the OpenOCD interface directory.

## Use this with Turtelizer 2:
BURNDONGLE=turtelizer2

## Original configuration:
# BURNDONGLE = openocd-usb


## Choose the target board
## -----------------------
## A file with this name and extension .cfg must exist in
## the OpenOCD board directory.

# BURNBOARD = myboard

## Try to determine this automatically.

ifeq ($(PLATFORM), ETHERNUT2)
BURNBOARD = ethernut5
endif
ifeq ($(PLATFORM), ETHERNUT3)
BURNBOARD = ethernut3
endif
ifeq ($(PLATFORM), ELEKTOR_IR1)
BURNBOARD = eir
endif
ifeq ($(PLATFORM), AT91SAM9260_EK)
BURNBOARD = atmel_at91sam9260-ek
endif
ifeq ($(PLATFORM), AT91SAM7X_EK)
BURNBOARD = olimex_sam7_ex256
endif


## Choose the target CPU
## ---------------------
## Typically this is specified in the board configuration.

# BURNTARGET = sam7x256


## Choose the command sequence
## ---------------------------
##

## Terminates configuration stage. Use with all targets.
BURNCMDS  = -c init

## Works fine with the latest OpenOCD configs.
BURNCMDS += -c "nut flash ./$(TARG)"
BURNCMDS += -c shutdown

## Running Ethernut 3 RAM images.
# BURNCMDS=-c init -c "run_ram_image ./$(TARG)" -c shutdown

## Example for an explicit command sequence.
# BURNCMDS=-c init -c "reset init" -c "load_image $IMGFILE 0" -c "verify_image $IMGFILE 0" -c "resume 0" -c shutdown

## Example for an external script.
# BURNCMDS += -f $(top_srcdir)/tools/flash/flash.script
# BURNCMDS += -c "flash write_image erase ./$(ITARG) 0x00100000 bin"
# BURNCMDS += -f $(top_srcdir)/tools/flash/flash-exit.script

# Terminate OpenOCD. Use with all targets.
BURNCMDS += -c shutdown


# Choose the executable
# ---------------------
# Your OpenOCD executable may have a different name.
#
BURN=openocd


# No change required
# ------------------
# Anything below this line will typically work out of the box.
#
ifneq ($(BURNDONGLE),)
BURNCONFIG += -c "source [find interface/$(BURNDONGLE).cfg]"
endif
ifneq ($(BURNBOARD),)
BURNCONFIG += -c "source [find $(BURNBOARD).cfg]"
endif
ifneq ($(BURNTARGET),)
BURNCONFIG += -c "source [find target/$(BURNTARGET).cfg]"
endif

BURNFLAGS=-s $(top_srcdir)/tools/turtelizer2 $(BURNCONFIG) $(BURNCMDS)
If it has been correctly set up, you can open a command line window, change to your application directory, set the correct PATH and use make clean all burn to get your modified application code running. Here is the complete sequence for Windows PCs:
set PATH=PATH=C:\ethernut-4.9.8\nut\tools\win32;"C:\Programm Files\yagarto\bin";%PATH%
cd \ethernut-4.9.8\nutapp-enut31d-rom\lua
make clean all burn
This example assumes, that Nut/OS had been installed in C:\ethernut-4.9.8 and YAGARTO in C:\Programm Files\yagarto\bin and that the build and application trees had been create in C:\ethernut-4.9.8\nutbld-enut31d-rom and C:\ethernut-4.9.8\nutapp-enut31d-rom resp. Do not forget to select arm-oocd for the programmer and at91_rom for the linker script in the Nut/OS Configurator.
Automation with JTAG-O-MAT
Since version 1.2.6, JTAG-O-MAT can be used as an OpenOCD client, which allows to automate firmware uploading. However, this solution is less flexible and less reliable than the latest TCL scripting support provided by OpenOCD.
Known Problems
OpenOCD fails to detect Turtelizer 2
OpenOCD may not detect the Turtelizer 2. Unfortunately the USB drivers provide
different device names, either "Turtelizer JTAG/RS232 Adapter A" or "Turtelizer
JTAG/RS232 Adapter" (without trailing A).
Use a text editor to change the related entry ft2232_device_desc in interface/turtelizer2.cfg, either adding or removing the trailing A.
Unreliable Nut/OS Source Code Debugging
When using Insight or Eclipse for source code debugging, single stepping may
not work, breakpoints may not work or the debugger may even crash.
Nut/OS uses the compile option -fomit-frame-pointer. When compiling code for source code debugging, this option should been removed from the CPFLAGS and CXXFLAGS entries in the related Makedefs files (located in the source tree):
nut/Makedefs.arm-gccdbg
Used to build the Nut/OS libraries.
nut/app/Makedefs.arm-gccdbg
Used to build Nut/OS applications libraries.
OpenOCD cannot validate JTAG chain
When starting OpenOCD, it is required that the JTAG connector is
plugged in the target socket and that the target board's power
supply is switched on.
OpenOCD cannot find an image or script file
File name paths need to be given absolut or relative to the location
where openocd had been started. The start location of your TELNET
session is irrelevant.
OpenOCD reports work space problems
For certain operations OpenOCD needs some scratch RAM and newer releases need
even more than their predecessors and may report something like
Warning: target.c:853 target_alloc_working_area():
not enough working area available(requested 32768, free 16288)
Luckily Ethernut 3 has plenty of RAM. Replace the following line in enut3ocd.cfg
working_area 0 0x3C000 0x4000 nobackup
by
working_area 0 0x30000 0x10000 nobackup
Flashing Ethernut 3 fails
The Flash memory on Ethernut 3 supports the
Common Flash Memory Interface standard, which is used by OpenOCD
to determine certain parameters. However, the related code was broken
throughout several releases. The last known working release was r146.
Fortunately, the problem seems to be fixed in newer releases (r279 at the time
of this writing).
No Turtelizer Serial Port on OS X
There is a problem with the FTDI drivers on OS X. If the Turtelizer adapter is
known to OS X, both interfaces will be claimed as serial ports and the JTAG
interface will no longer be available. Thus, it is probably better to give
up the serial port and use the Turtelizer for JTAG only.
Turtelizer Power LED not working
JTAG Error LED permanently lit
Well, there is no power LED on Turtelizer 2. One of the two bi-color LEDs
is used by the JTAG interface, the other one by the RS-232 interface.
Turtelizer 2 mainly draws its power from the USB interface. When plugged in, none of the LEDs will lit.
The JTAG LED is controlled by OpenOCD. The current version simply toggles between red and green. When JTAG activity has ended, it may stay red or green.
The RS232 LED will flash green on incoming and red on outgoing data.
External Links
Truly Integrated
offers a Turtelizer 2 clone with standard 20-pin JTAG adapter.
openocd.berlios.de/web/
Open On-Chip Debugger Project Homepage.
www.yagarto.de
GNU ARM Toolchain for Windows PCs.
www.fh-augsburg.de/~hhoegl/da/da-25/thesis.pdf
The original diploma thesis by Dominic Rath, which describes OpenOCD.
www.ftdichip.com
FTDI manufactures the FT2232 used in the Turtelizer 2.
www.eclipse.org
Eclipse Project Homepage.
www.egnite.de
egnite manufactures and sells the Turtelizer 2.
Castrop-Rauxel, February the 21st, 2008