

Configuring the Eclipse IDE for Nut/OS
We assume, that you successfully installed Eclipse and the required C development tools, as described in the Nut/OS Software Manual. You must have a working GCC cross development toolchain.
The Integrated Development Environment (IDE) offers a convenient way to edit your source code and to build Nut/OS binaries for the target system. This includes several parsers, which are working silently in the background to provide all kind of additional information while you are editing the source code. Although sometimes a little bit tricky, just a few configuration steps are required to make these helpful features available.
Creating a New Project
The easiest way to configure Eclipse for Nut/OS is to create a simple Makefile project, re-using an existing Nut/OS sample. We will demonstrate this using the Nut/OS sample events. Please refer to the Nut/OS Software Manual on how to use the Configurator to build the Nut/OS libraries and a sample directory for your target board.
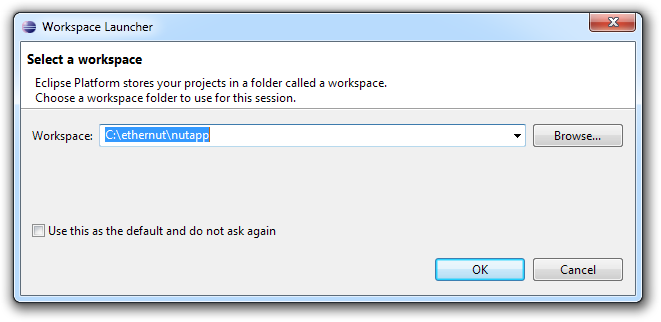
If already running, terminate Eclipse and start it again. This time select the Nut/OS sample directory that you created with the Configurator as your workspace. Typically this is located in directory nutapp in the Nut/OS installation directory. Do not use the sample directory nut/app in the Nut/OS source tree.
If still in the virgin state, Eclipse will present the welcome page. Click on Workbench in the upper right corner.
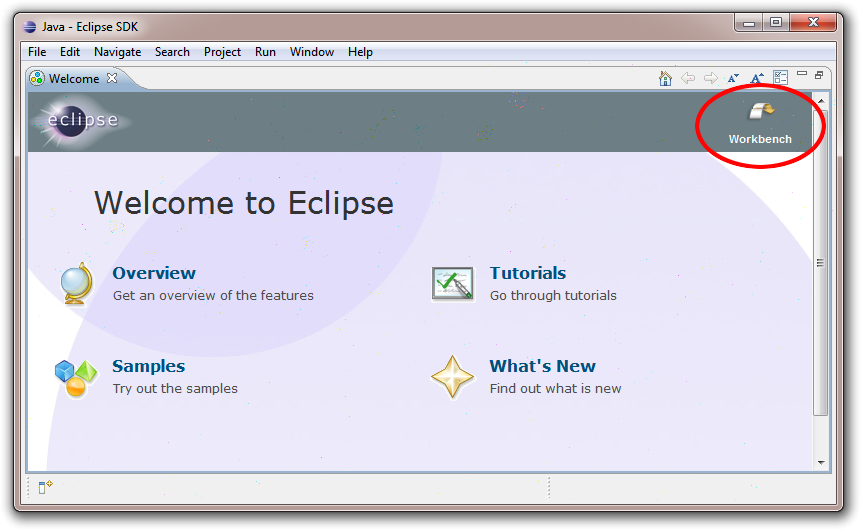
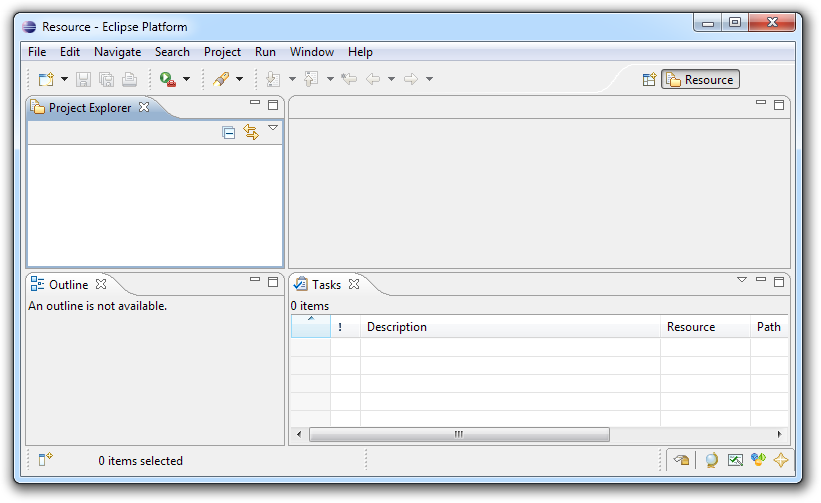
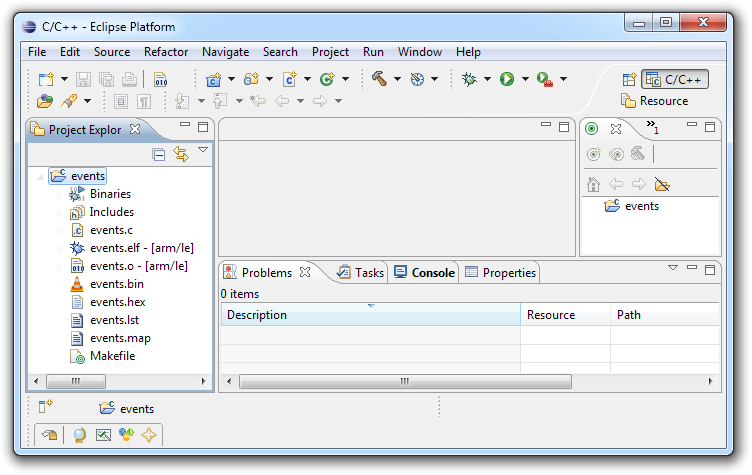
The so called Resource Perspective appears. We will later change to the C Perspective.
In the File menu select New and Project....
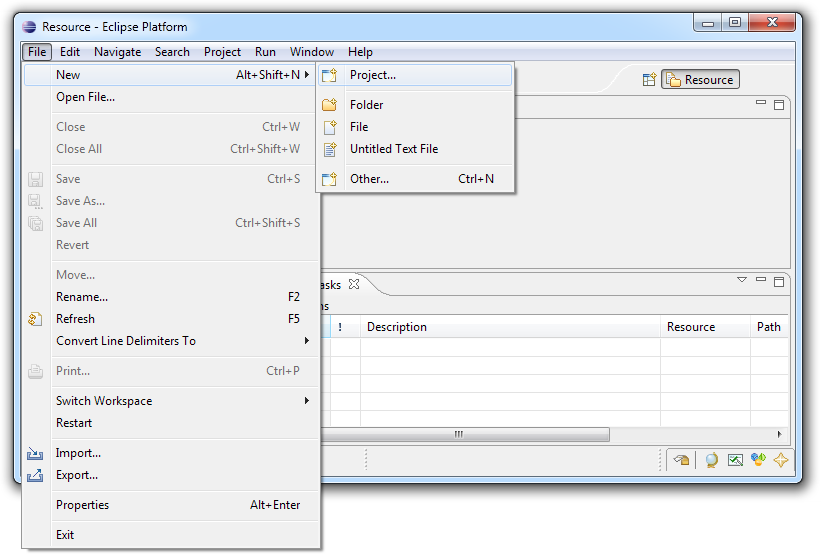
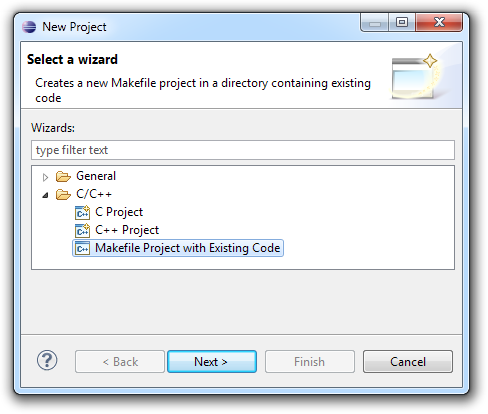
In the New Project dialog choose Makefile Project with Existing Code and click on Next.
In the following dialog we will Import Existing Code from the sample directory nutapp/events. You may use the Browse button to locate the directory in the Nut/OS installation path. The project name events will be added automatically, though, you may change it, if you like.
Further, unselect C++ and select the Cross GCC toolchain for indexer settings.
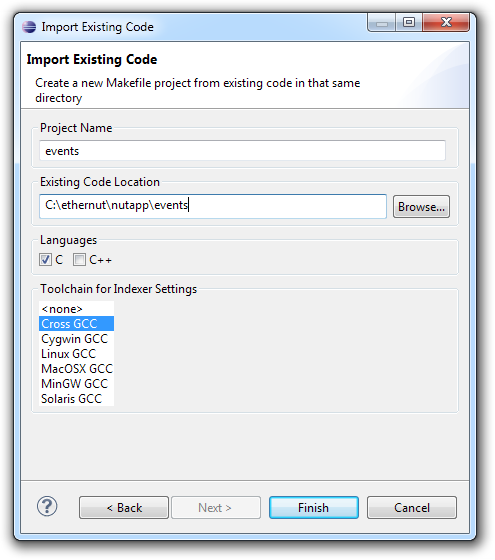
Finally click Finish.
Eclipse may ask, if you want to switch to the C/C++ perspective now.
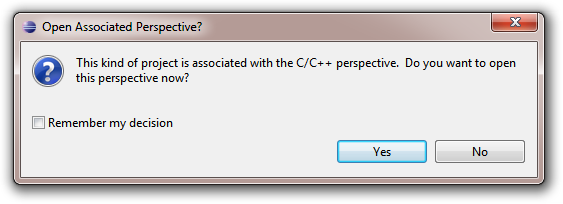
Click Yes to open the C/C++ perspective.
If this dialog doesn't appear, you will be back in the Resource Perspective. No problem. Click on the tiny button with the plus sign in the upper right to add a new perspective and then select C/C++.
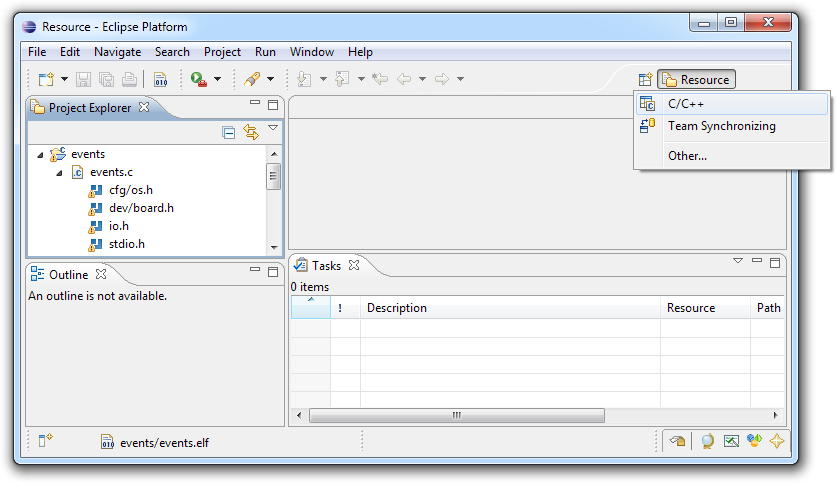
We do not need the Resource Perspective any longer. Activate its context menu by clicking on the Resource tab with the right mouse button (or Ctrl+Click on OS X) and close it.
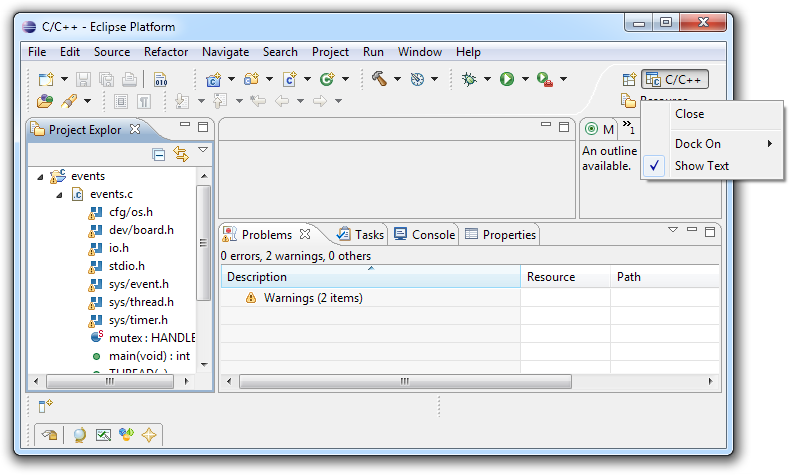
You have now created a C cross development project in Eclipse. As you may have noticed already, there are several warning signs. They appear, because the code parser is not yet able to get the full picture of project's source code. Read on, we will try to solve this now.
General Configuration
The following configuration items enable Eclipse to parse the full source code of any Nut/OS project. This includes not only the application code, but also the libraries and all related header files. As you probably assume, Eclipse needs to know a few things about your compiler configuration and the linked libraries. It is often a bit difficult to figure out these settings, but don't worry. In the worst case Eclipse will misinterpret parts of your code, displaying false warnings or errors. Nevertheless your code will still build and run fine. If you are in a hurry, you may simply skip this chapter.

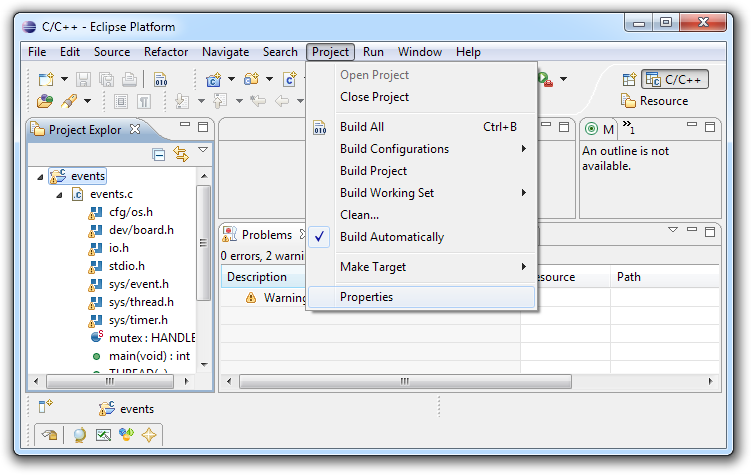
In a first step we will tell Eclipse, where to find the header files. Open the project properties by selecting Properties in the Project menu.
In the Project Property dialog select the page Paths and Symbols, a sub item of C/C++ General.
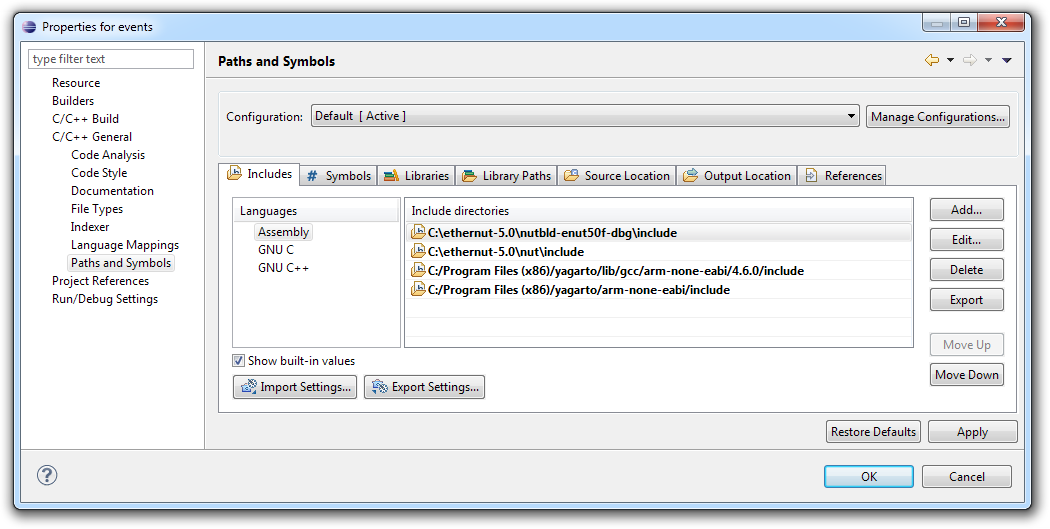
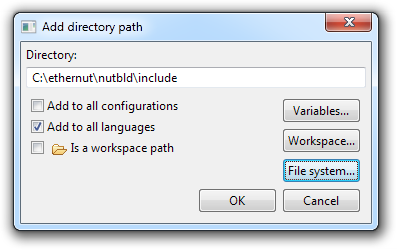
If not already selected, click on the tab that is titled Includes. You can now use the action buttons on the right to add, edit, delete and move include directories.
Which directories to choose? Actually you need to provide all directories, that are available to the compiler (more precisely to the pre-processor) when building the Nut/OS application. Some are provided on to the compiler as command line options (pre-pended by -I), others are built-in.
Those on the command line are added by the Configurator when creating the Makefiles. Usually there are only two of them. The include directory that is searched first, is located in the Nut/OS build tree, nutbld/include by default. The second directory is located in the source tree nut/include.
If the source code refers to a header file not found in the directories given on the command line, the preprocessor will search so called built-in paths. Their location depends on the toolchain configuration. When using YAGARTO on Windows, you will find them in the YAGARTO installation directory.
Note, that the sequence of the entries is important. In general, the most target specific headers must come first, while the most general header files should be located in the path that is the last entry in the list. Also make sure, that the same paths are specified for all languages, Assembly, C and even if not well supported by Nut/OS, C++.
Like with include paths, symbols (more precisely named preprocessor macros) may be given on the command line or may be built-in. Click on the Symbols tab to enter a list of macros.
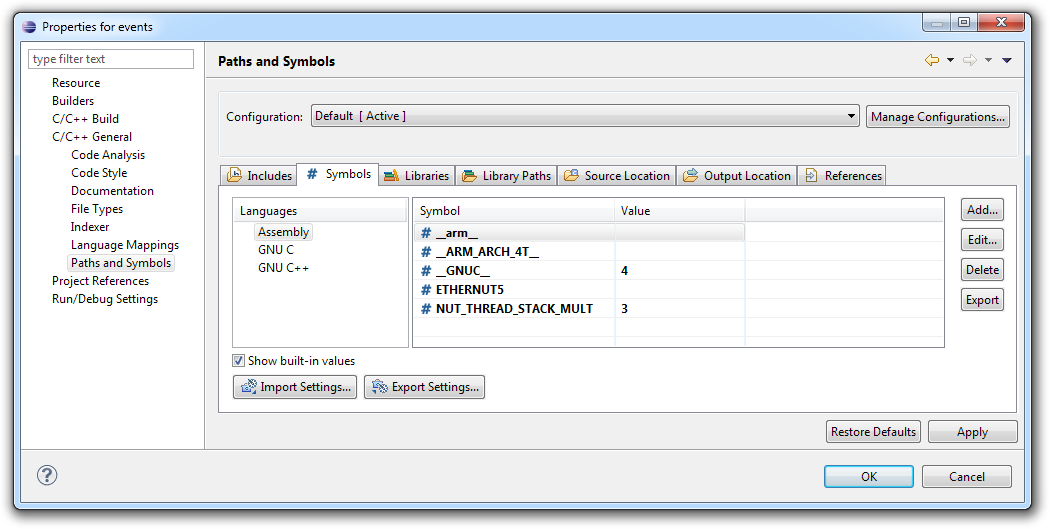
Again, the Nut/OS Configurator is responsible for providing the right macros for the compiler command line, pre-pended by -D. In most cases a single one is used, the name of the target board.
On the other hand, the list of built-in macros is quite large. Luckily, Nut/OS uses a few only. In most case the following macros definitions will be sufficient.
| Symbol | Value | Description |
|---|---|---|
| __arm__ | Compiler built-in. | |
| __ARM_ARCH_4T__ | Compiler built-in, when compiling for an ARM7TDMI target. For other targets, different macros are used. | |
| __GNUC__ | 4 | Compiler built-in. The value specifies the major version. |
| ETHERNUT5 | Platform macro as specified in the Nut/OS Configurator. This one is for the Ethernut 5 board, other boards use different ones. | |
| NUT_THREAD_STACK_MULT | 3 | Actually not really required for source code browsing, but may help, when later running the debugger. |
Solving Parser Problems
It is sometimes difficult to determine the correct include paths and symbols to let Eclipse correctly find all header files. If you are like me, you will be permanently bugged by any red underlined part in your source code.
To find the required include file paths, run make on the command line (see the Nut/OS Software Manual) and watch out for the compiler option -I, e.g.
-I../../nutbld-eir10c/include -I../../nut/include
At least these paths must be added to the project properties Paths and Symbols. Furthermore you must add the built-in paths of the compiler, which can be retrieved by the following command
arm-none-eabi-cpp -x c -v
In any case, you should only absolute paths to the project properties, e.g.
c:/ethernut/nutbld-eir10c/include
c:/ethernut/nut/include
We can also use the command line to get a sorted list of pre-defined symbols (macros). For this, it is required to specify the architecture. Ethernut 3 or the Elektor Internet Radio are based on the ARM7TDMI.
arm-none-eabi-cpp -mcpu=arm7tdmi -dM -E - < NUL | sort
On Linux replace NUL with /dev/null. For Ethernut 5 use
arm-none-eabi-cpp -mcpu=arm9 -dM -E - < NUL | sort
Build Configuration
In contrary to the last chapter, configuring a correct build environment is essential. Otherwise you won't be able to build the binaries. You may still use the command line to execute make, but in that case Eclipse won't be useful any more.
Luckily we chose a Makefile project, so most of the configuration items had been put into the Makefiles by the Configurator. The only thing we must provide is the path to our tools, Nut/OS tools as well as tools provided by the toolchain.
C:\ethernut-X.Y\nut\tools\win32;C:\Program Files (x86)\yagarto\bin;${PATH}
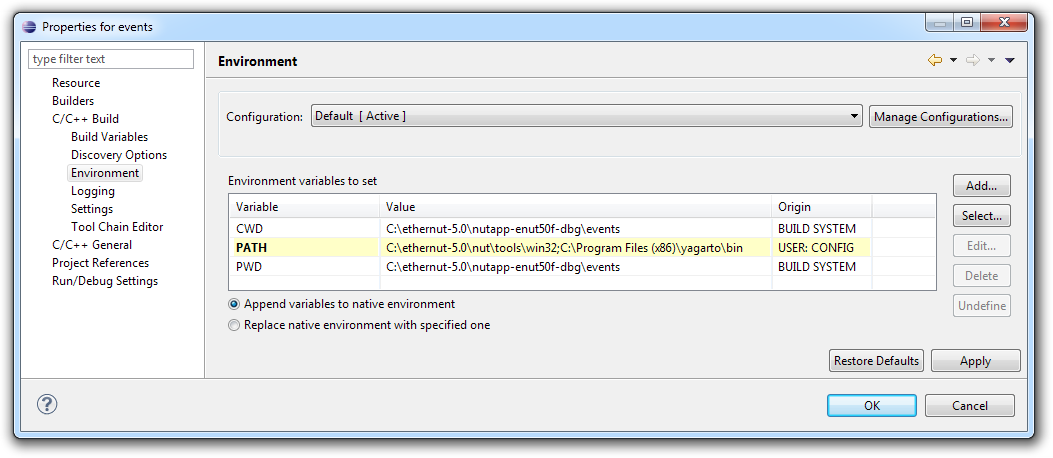
Note, that the option Append variables to native environment does not mean, that the value of the PATH variable will be appended to an existing PATH variable. Instead, non-existing variables will be appended to the initial environment. If you define a variable, which already exists, then its value will be replaced. Therefore, if you want to keep the default path, you need to include ${PATH} in the PATH variable's value.
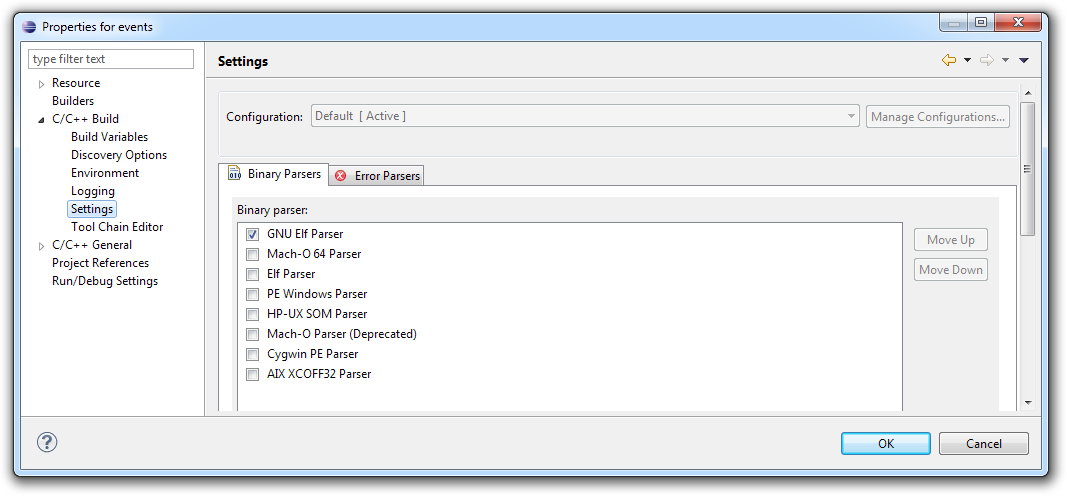
Not really required for building, but essential for debugging: The parser for the binary. With GCC we must enable the GNU Elf Parser and disable any of the others.
Click OK to save your settings.
To test your configuration, open the Project menu and select Build Project.
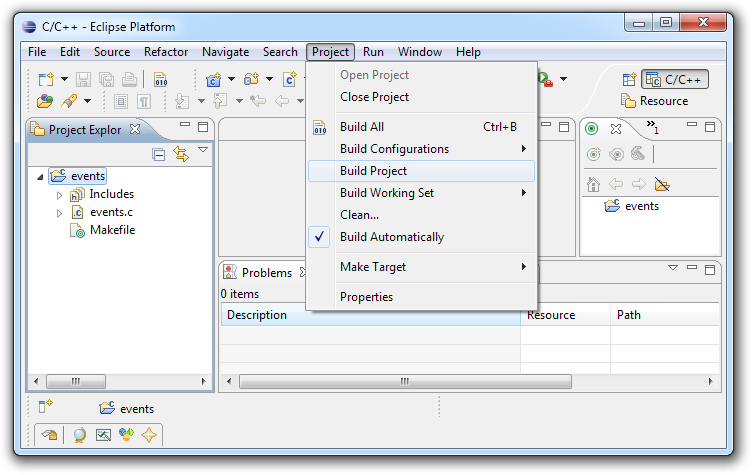
If no problems were found, Eclipse will create the final binaries of our events application.
A final note: Dependencies are not maintained in Nut/OS Makefiles. To make sure, that your code is properly rebuilt after source code changes, you should clean the project first before re-building it.
Solving Path Problems
Quite often, specifically on Windows PCs, the first attempt failed and no target will be built. If you are lucky, Eclipse will provide a useful error message in the Console.
Cannot run program "make": Launching failed
Error: Program "make" is not found in PATH

PATH=[C:\ethernut\nut\tools\win32;C:\Program Files (x86)\yagarto\bin]
Here, the path to the Nut/OS tools is probably wrong, because the root path typically contains the version number, e.g. ethernut-4.10.
Error reports from make itself are quite verbose, but less informative.
process_begin: CreateProcess(NULL, arm-none-eabi-gcc...
The system cannot find the file specified.
Here arm-none-eabi-gcc was not found, probably because the path to YAGARTO's bin directory was missing or wrong. Sometimes there is no console output at all and nothing is built. Sometimes you will use more advanced Makefiles, which may require additional environment settings.
The first thing you should try is to run make without Eclipse on a simple command line, as explained in the Nut/OS Software Manual
If this works, you should create a command line window from within Eclipse, which allows you to further evaluate your environment. This is not always that easy. On Windows I found the following solution.
Add a new target to the end of your Makefile
cmdline:
        mycmdline.bat
It is very important to use a tab in front of test.bat, spaces won't work. Now create a batch file mycmdline.bat in the same directory, containing a single line only.
start
To start the batch file, make sure that the project is selected in the Project Explorer and then select Make target...Build... in the project menu.
Click on Add... to create a new target. Enter the name cmdline and keep the option Same as the target name enabled. When you click OK, you will see your new target in the list. Select it and click on Build. A new command line window should open, which you can use to further evaluate your problem, test environment settings etc.
Next Step
If you finally succeeded in building the project, then you are ready to configure the debugger.